The latest module in our CPD series introduces the key considerations in the design and installation of walk-in shower areas. This module is sponsored by Schlüter-Systems

How to take this module
UBM’s CPD distance-learning programme is open to anyone seeking to develop their knowledge and skills. Each module also offers members of professional institutions an opportunity to earn between 30 and 90 minutes of credits towards their annual CPD requirement.
This article is accredited by the CPD Certification Service. To earn CPD credits, read the article and then click the link below to complete your details and answer the questions. You will receive your results instantly, and if all the questions are correctly answered, you will be able to download your CPD certificate straight away.
CPD CREDITS: 60 MINUTES
DEADLINE: 4 SEPTEMBER 2015
INTRODUCTION
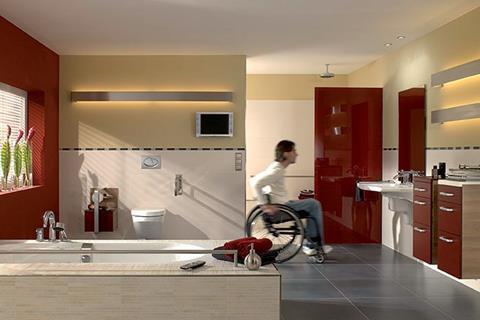
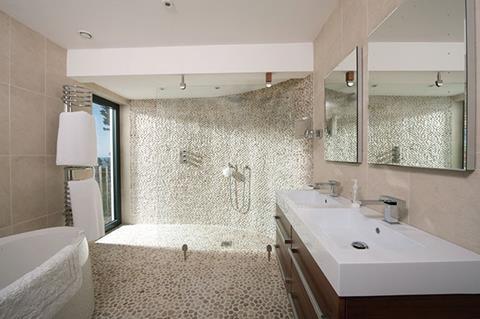
A wetroom is a walk-in shower area, level with the surrounding floor. The shower area has a slight slope in the floor towards the drain to allow water to flow away effectively and to help contain the water. This CPD will provide an introduction to six key areas of consideration:
- Tiling and relevant standards
- Safety considerations
- Waterproofing
- Shower build-up and drains
- Finishing profiles
- Underfloor heating
Ultimately, an integrated system solution, with products that are designed to work together, should be the specifier’s first choice when selecting products to use in shower areas and wetrooms. This provides the client with a single point of responsibility should any part of the system fail.
TILING AND RELEVANT STANDARDS
Not all tiles are suitable for use in a wetroom installation. All tile and stone coverings should conform with the requirements of BS EN 14411 “Ceramic tiles – Definitions, classifications, characteristics and marking”. This contains test methods for characteristics such as water absorption, slip resistance, breaking strength and impact resistance. For wetrooms, it is particularly important that tiles with high slip resistance should be specified.
The tiling background is another important consideration – in particular, its strength and its sensitivity to water. Wall backgrounds such as plasterboard and gypsum plaster, for example, could absorb moisture, but can be acceptable for domestic installations. BS 5385-4 “Wall and floor tiling: Design and Installation of ceramic and mosaic tiling in special conditions. Code of practice” provides guidance to ensure that the tiling background supports the weight of the chosen tile or stone.
In terms of fixing, a cement-based adhesive that meets the C2 classification under BS EN 12004 “Adhesives for tiles. Requirements, evaluation of conformity, classification and designation” is suitable in most cases. Where a porous wall tile is used, a C1 cement-based or a D2 ready-mixed adhesive can be used. For grouting, specify a water-resistant cement-based grout with a minimum CG2 classification under BS EN 13888 “Grout for tiles. Requirements, evaluation of conformity, classification and designation”.
SAFETY CONSIDERATIONS
In addition to ensuring that tiles have a high level of slip resistance, there are other important safety aspects to wetroom design. Falls within the shower should be between 1:80 and 1:35. Any less than 1:80 and water will not drain; any steeper than 1:35 and it becomes inconvenient and dangerous for users. The flow of water from the showerhead must also be less than the drainage rate.
When specifying for disabled use, there are further factors to consider. Particular attention should be given to floor surfaces to provide good grip for bare feet, shod feet and tyred wheels, and the use of contrasting colours is advised for enhanced visibility. Refer to Approved Document M of the Building Regulations and BS 8300 “Design of buildings and their approaches to meet the needs of disabled people. Code of practice” for guidance.
WATERPROOFING
BS 5385-4 recommends that in tile and stone installations that are not immersed, but subject to frequent contact with water, the basic structure behind the tiles should be watertight. It also states that the use of a ceramic tile together with an impervious grout and adhesive is not a substitute for a tanked installation. In other words, the use of tile and stone as a finish does not guarantee a waterproof surface or structure. Most cement-based adhesives and grouts are partially absorbent. Moisture can penetrate the grout joints and the adhesive into the tiling background.
It is important to understand that “water-resistant” does not mean “waterproof”. Inadequate waterproofing and moisture management can lead to water ingress, and leaks can cause serious damage and result in expensive repairs.
Common waterproofing methods include:
- Waterproof backer boards As well as providing extra weight support for tile and stone, these boards are waterproof, lightweight and easy to handle and install on site, requiring no additional waterproofing. They generally require waterproofing tapes at junctions and corners for reinforcement. These are usually made of a fibreglass surface layer with an extruded waterproof polystyrene centre. Some also have a cement layer. The benefits of waterproof backer boards include:
- Lightweight. A proprietary high-pressured foam-core, non-cementitious, waterproof backer board typically weighs about 1kg per m².
- Strong. Lightweight backer board systems can support weights of up to 60kg per m2.
- Quick installation. They are easy to cut with a utility knife, and no priming is needed. Board joints are easily sealed and then there is no further need for additional waterproofing membranes.
The choice of products free of cement and fibreglass may contribute to an improved green rating for a project.
Many materials are unsuitable as tiling substrates. These include plywood, plasterboard, chipboard, particle board, medium-density fibreboard, oriented strand board and plaster. BS 5385-4 recommends that if sheets and boards are not dimensionally stable in changing humidity, they should not be used in wet or damp conditions.
Flexible sheet membranes These are usually manufactured from either polyethylene, bitumen or rubberised materials. They can provide waterproofing beneath tiles or natural stone over various substrates. Tiles are generally fixed directly to the sheet membranes with tile adhesive.
The benefits of flexible sheet membranes include their light weight, ease of installation and suitability for walls and floors. They are also hardwearing and provide a consistent thickness and even surface. Unlike paint-on systems, no mixing is required and tiling can be carried out immediately. For ease of installation and guaranteed waterproofing, they are available in preformed collars and inserts.
Nearly all pressure-sensitive, adhesive-backed membranes require a primer to be applied to the substrate before adhering the membrane to the surface. These primers are generally water-based polymer dispersions; they are rolled or brushed on the surface and must be completely dry before bonding the membrane to the primer. Depending on environmental conditions, this can take an hour or more.
Membranes that do not have a pressure-sensitive adhesive backing must be bonded to the substrate with an adhesive, most commonly, a suitable tile adhesive. The adhesive is spread on the substrate with a notched trowel, and the membrane is rolled into the wet adhesive. Installation needs to ensure that no air remains between the membrane and the substrate when the adhesive is applied. Joints need to be securely sealed with waterproof sealing tapes and suitable sealant adhesives.
For floors, waterproof “uncoupling” membranes can be specified. These are flexible layers that “uncouple” the tiling from the substrate, allowing both to have a degree of movement, and therefore avoiding cracking in the tile and stone covering. The surface layer of these membranes has a cavity design that enhances bonding with the tile adhesive and facilitates drainage of any water that has penetrated the floor.
All sheet membranes should now carry CE marking, Declaration of Performance ETA 09/0027.
Liquid-applied waterproofing membranes These systems come in either one or two parts. They are normally applied by a brush or roller, and when dry form a waterproof barrier. Both types require mixing, after which they must be applied within a limited time-frame.
Not all waterproof membranes function as vapour retarders. It is advisable to consult the membrane manufacturer for water vapour permeance values when specifying for wetrooms and steam rooms. A quality benchmark of 0.90 perms should be followed in wetrooms and steam showers.
Liquid-applied membranes are easy to install in hard-to-reach areas such as around pipes and in corners. However, they also have some disadvantages, including:
- Once mixed, there is a time limit for installation
- Two paint-on applications are often needed
- Installers must wait for the liquid membrane to dry before tiling onto the surface, adding extra time to a project.
SHOWER BUILD-UP AND DRAINS
The shower area of a wetroom can be built up using a selection of prefabricated inclined shower trays and levelling boards. Some shower trays may already have waterproofing surfaces built in. Prefabricated inclined shower trays come in different sizes and shapes, and can normally accommodate both central and linear drain systems.
One advantage of prefabricated trays over building up the sloped shower area with screeds is that they already have a fall ratio compliant with industry guidelines. They are also easy and quick to install, and can be used on various bases, including timber and concrete, in conjunction with levelling boards.
In terms of drainage system, there are two types: linear and central. Central drains are also referred to as “point” drains with water draining into them on four sides. Linear drains are channels which can be positioned centrally with slopes on each side, or at the perimeter of the shower area with one slope.
Important considerations when choosing a drainage system include the following:
- The drainage rate must be greater than the water flow rate from the shower head
- They must be designed to be tiled on
- They must include an odour trap that is accessible from above
- There must be an appropriate assembly height for the project area.
FINISHING PROFILES AND MOVEMENT JOINTS
Profiles add a neat, long-lasting finish to wetroom tiling. Commonly, they feature two elements: the anchoring leg, which allows the profile to sit within the adhesive bed; and the “body”, which is the visible part, finishing and protecting the tile edge. A variety of materials, colours and surface finishes are available offering protection, durability and a range of aesthetic choices.
Profiles for floor areas can also act as a ‘movement joint’. These should be considered in line with BS 5385 and enable the environment to function, preventing cracks by absorbing movement within the floor and walls. The use of preformed movement joints also allows for maintenance-free application and makes cleaning easier while blending into the overall design. Wherever there’s a change in floor level or substrate material and age, movement joints should be included.
UNDERFLOOR HEATING
When specifying an underfloor heating system for a wetroom with tile and stone coverings, these key points should be considered:
- Installation time How quickly can the system be installed? Some systems are easier to install than others. For instance, a system where cables can be easily clipped in between studs on the matting and stay in position securely will save installation time.
- Construction height A system with a low construction height will be more adaptable – that is, ideal for renovations and buildings with low ceilings.
- Efficiency Energy saving is also a major consideration. Some systems are designed so that the cables are placed closer to the surface in a reduced screed mass, therefore enabling it to run at a significantly lower temperature.
- Design Some systems do not require screed movement joints, giving the designer more control of the surface tile or stone design.

How to take this module
UBM’s CPD distance-learning programme is open to anyone seeking to develop their knowledge and skills. Each module also offers members of professional institutions an opportunity to earn between 30 and 90 minutes of credits towards their annual CPD requirement.
This article is accredited by the CPD Certification Service. To earn CPD credits, read the article and then click the link below to complete your details and answer the questions. You will receive your results instantly, and if all the questions are correctly answered, you will be able to download your CPD certificate straight away.
CPD CREDITS: 60 MINUTES
DEADLINE: 4 SEPTEMBER AUGUST 2015
Privacy policy
Information you supply to UBM Information Ltd may be used for publication and also to provide you with information about our products or services in the form of direct marketing by email, telephone, fax or post. Information may also be made available to third parties. UBM Information Ltd may send updates about Building CPD and other relevant UBM products and services. By providing your email address you consent to being contacted by email by UBM Information Ltd or other third parties. If at any time you no longer wish to receive anything from UBM Information Ltd or to have your data made available to third parties, contact the Data Protection Coordinator, UBM Information Ltd, FREEPOST LON 15637, Tonbridge, TN9 1BR, Freephone 0800 279 0357 or email ubmidpa@ubm.com. View our full privacy policy at www.building.co.uk/cpd











No comments yet